So erstellen Sie ein gutes Swimlane-Diagramm

Wie finden Sie die Balance zwischen der Erstellung von Dokumentationen, die spezifisch genug sind, damit die Benutzer sie verwenden können, ohne zu viel Text zu schreiben? Eine gute Antwort ist, Ihre schriftliche Prozessbeschreibung durch ein Swimlane-Diagramm zu ersetzen. In diesem Beitrag geht es darum, wie Ihnen das gelingt.
Beachten Sie, dass es viele BPM- und Visio-Experten gibt, die diesen Bereich verkomplizieren können. Wenn an Ihrem Prozess Menschen beteiligt sind, benötigen Sie lediglich ein einfaches Swimlane-Diagramm. Neu bei der Prozessabbildung? Sehen Sie sich unseren einfachen Leitfaden zur Prozessabbildung an.
Wie funktioniert ein Swimlane-Diagramm?
Ein Swimlane-Diagramm verdeutlicht, „wer was macht“. Das ist es, was den Menschen wichtig ist. Alles andere birgt die Gefahr, dass es zu Unordnung führt und die Menschen daran hindert, Ihre Prozessdokumentation zu verstehen. Wenn Sie sich nicht darauf konzentrieren, dann landen Sie in der Dokumentation um der Dokumentation willen.
Die Fokussierung auf das „Wer macht was“ macht Sinn, wenn die Forschung zeigt, dass Prozesse selten daran scheitern, dass Individuen ihre Arbeit nicht machen (Deming). Prozesse scheitern, weil Übergaben und Wissenstransfer zwischen Menschen schief gehen. Der eine denkt, dass seine Arbeit erledigt ist, und der nächste weiß nicht, dass ihm der Fehdehandschuh übergeben wurde. Diese Unsicherheit stoppt den Prozess. Wie ein schwarzes Loch in Ihrem Unternehmen. Hier ist ein Verantwortlichkeitsverlaufsdiagramm nützlich. Es zeigt genau, welche Rolle für welche Tätigkeit zuständig ist. Wenn man Menschen mit Rollen verbindet, dann macht es für alle Sinn.
Jetzt haben Sie die Grundlagen und können mit der Erstellung Ihres Verantwortlichkeitsverlaufsdiagramms beginnen.
Schritt 1: Benennen und Festlegen des Verantwortlichkeitsbereichsdiagramms
Zuerst müssen Sie einen Prozess auswählen, mit dem Sie beginnen möchten. Sie können mit dem Geschäftsmodell, der Wertschöpfungskette oder der aktuellen Prozesshierarchie Ihres Unternehmens beginnen. Dieser erste Schritt ist eine natürliche Aktivität des Top-Managements – spätere Schritte sollten die Personen einbeziehen, die die Arbeit erledigen werden.
Alternativ können Sie den Prozess starten, der den größten Einfluss auf Ihr Kundenerlebnis hat – oder bei dem Sie die größten Verbesserungsmöglichkeiten haben.
Die Bearbeitung von Beschwerden ist wichtig, um gut zu sein, also werde ich das als Beispiel verwenden. Um es zu benennen, ist es am besten, es als Imperativ zu schreiben – „Kundenbeschwerde bearbeiten“. Das macht es persönlich und umsetzbar. „Beschwerdemanagement“ klingt eher nach einem Abteilungsnamen. Vermeiden Sie jeglichen Jargon.
Wenn Sie Ihren Prozess ausgewählt und benannt haben, müssen Sie die Grenzen dafür festlegen. Was ist das Ergebnis? Was fängt damit an? Und wie endet es?
Beginnen Sie mit dem Ergebnis des Prozesses. Bei der Bearbeitung von Beschwerden geht es im Wesentlichen darum, verärgerte Kunden in glückliche Kunden zu verwandeln – und dabei nicht zu viel Geld auszugeben. Das Hauptergebnis ist also ein „zufriedener Kunde“.
Schritt 2: Wählen Sie einen Prozessverantwortlichen aus
Nachdem Ihr Prozess benannt und definiert wurde, ist es an der Zeit, den natürlichen Prozesseigentümer zu identifizieren. Für den Prozess „Kundenbeschwerde bearbeiten“ hängt die Antwort, die Sie auswählen, von Ihrem Unternehmen ab. Wenn Sie ein paar große Kunden haben, kann der natürliche Prozessverantwortliche Ihr CEO sein. Er oder sie sollte sich persönlich in einen wesentlichen Teil des Unternehmens einbringen, der gefährdet ist. Auf der anderen Seite, wenn Sie viele Kunden haben, kann der Prozessverantwortliche Ihr Kundendienstleiter sein. Entscheiden Sie sich für den Prozessverantwortlichen basierend auf…
- Für wen steht am meisten auf dem Spiel?
- Wer hat die Befugnis, den Prozess wirklich zu verändern? und
- Wer hat das beste Verständnis für den End-to-End-Flow?
Nehmen wir in diesem Fall an, dass der Kundendienstleiter der Eigentümer ist. Es ist eine wichtige Entscheidung, da wir der Person mit dieser Rolle die Befugnis geben, den Prozess in Zukunft zu verbessern.
Schritt 3: Starten Sie Ihr Swimlane-Flow-Mapping – das „Wer macht was?“
Jetzt, da der Umfang klar ist, haben Sie eine Grundlage, um mit dem Hinzufügen von Aktivitäten zu beginnen.
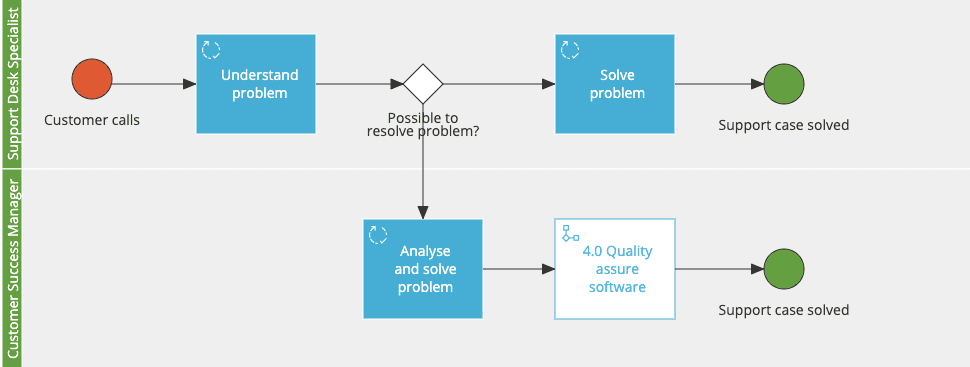
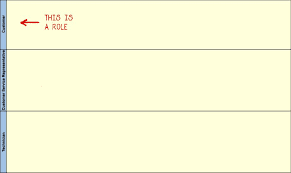
Beginnen Sie mit der Definition der beteiligten Organisationsrollen. Im Prozess „Kundenbeschwerde bearbeiten“ haben wir einen Kunden, einen Kundendienstmitarbeiter und einen Techniker. Jede Rolle hat eine Swimlane, die anzeigt, für welche Aktivitäten sie oder er verantwortlich sein wird.
Der Kunde reicht eine Reklamation ein. Dies ist das Ereignis, das den Prozess startet. Ein Ereignis ist ein Ereignis, das einen Prozessfluss startet (oder währenddessen auftritt).
Sobald das Ereignis „Beschwerde eingereicht“ eintritt, beginnt die Arbeit. Die Arbeit wird als „Aktivitäten“ definiert. Eine Aktivität beschreibt, für welches Ergebnis eine Person mit der entsprechenden Rolle verantwortlich ist, um den notwendigen Input für die Aktivität der nächsten Rolle zu liefern. Betrachten Sie es als eine Kette von Arbeiten, die wiederholt werden können.

Im Falle des Prozesses „Kundenbeschwerde bearbeiten“ ist die erste Aktivität der Kundendienstmitarbeiter, der die Beschwerde entgegennimmt. Sie muss die Aufgaben des Interviews mit dem Kunden, das Ausfüllen eines Beschwerdeformulars und das Einreichen in ein System erledigen. In diesem Fall ist die Ausgabe also, dass der Fall im System protokolliert wird.

Wie viel Arbeit ist eine Tätigkeit? Mein Rat ist, es zunächst einfach zu halten. Eine Aktivität kann viele Aufgaben umfassen und Minuten oder sogar Tage in Anspruch nehmen.
Die nächste Aktivität besteht darin, das Problem des Kunden zu lösen. Wir werden dies mit der Mitarbeiterin besprechen, da sie möglicherweise in der Lage ist, das Problem beim ersten Kontakt zu lösen. Dies ist das beste Kundenerlebnis.

Dies ist ein Entscheidungspunkt. Wir können also eine Entscheidung hinzufügen, wenn wir dies klar zeigen wollen. In diesem Fall trifft der Servicemitarbeiter die Entscheidung. Sie kümmert sich entweder sofort darum oder eskaliert es an einen Techniker.
Ich werde diesen Prozess vorerst einfach halten und nur eine letzte Aktivität hinzufügen, bei der der Servicemitarbeiter die Bestätigung erhält, dass die Beschwerde zur Zufriedenheit des Kunden bearbeitet wird. Wir können dann ein Ereignis hinzufügen, um dies zu schließen – oder angeben, welcher Prozess natürlich darauf folgt. (Dann fangen Sie an, die Beziehungen zwischen Ihrem Prozess – einem zukünftigen Thema – aufzuzeigen).

Dies ist eine Swimlane und wie Sie sie erstellen. Wir haben jetzt die Dokumentation. Das ist der einfache Teil. Der schwierige Teil besteht darin, es in die Tat umzusetzen. Das bedeutet, dass sie sich zwangsläufig verändern und weiterentwickeln muss.
Schritt 4: Ändern Sie es!
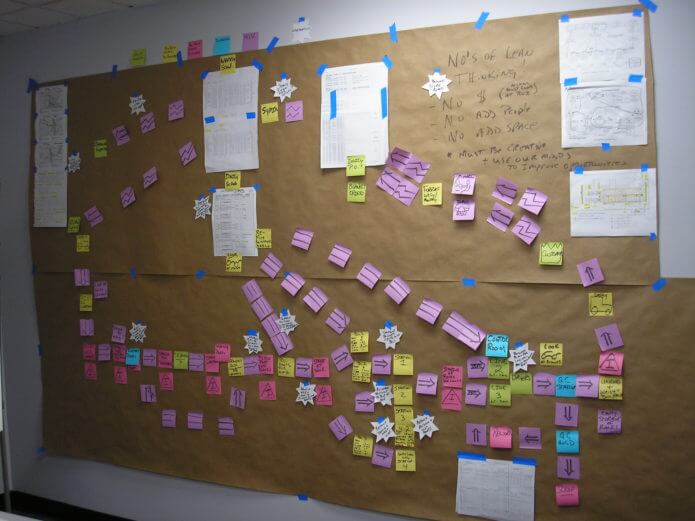
Woher zeichnen Sie Ihren Prozess? Einige verwenden Post-it-Zettel. Sie haben es sogar auf braunes Papier geklebt, damit sie es mitnehmen können.
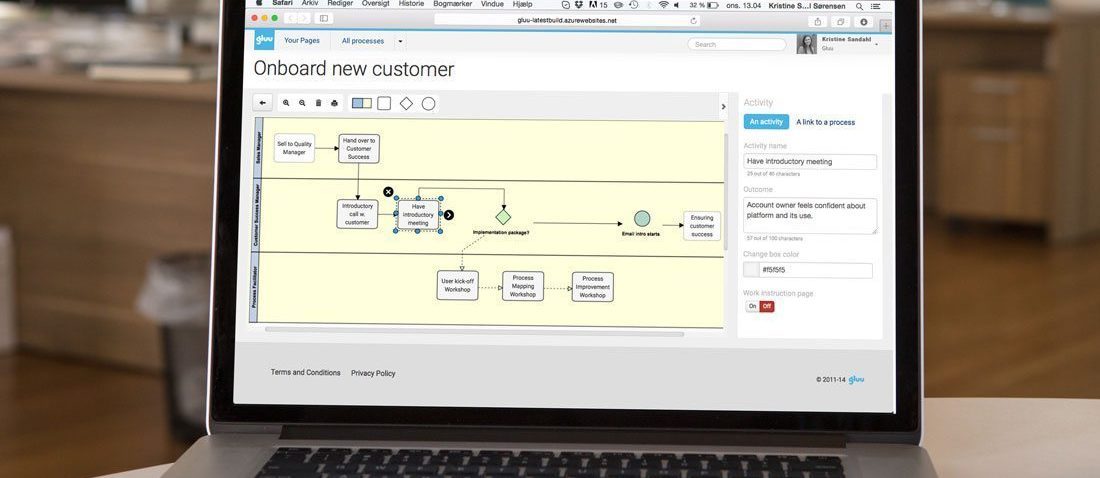
Was mache ich also, wenn ich es teilen und im nächsten Monat vielleicht wöchentlich ändern möchte? Wenn Sie Tools suchen, die das Prozessdesign, die Dokumentation und die laufende Verwaltung rationalisieren, lesen Sie unseren Leitfaden zur Auswahl von BPM-Software, um die richtige Plattform für Ihr Unternehmen zu finden.
Einige gehen zurück und zeichnen das Ganze in Visio neu. Dies nimmt viel Zeit in Anspruch und macht es zu „Ihrem Prozess“, was gut ist, wenn Sie ihn ausführen, aber weniger gut, wenn andere dies tun sollten. Wenn Sie es unbewusst als Ihre Schöpfung sehen, dann können Sie es (wenn Sie wie die meisten Menschen – und der Autor dieses Artikels – sind) leidenschaftlich verteidigen. Vielleicht haben Sie gute Argumente. Wenn nichts anderes, dann riskieren Sie, es zu verteidigen, weil Sie derjenige sind, der jedes Mal zu Visio zurückkehren muss, wenn jemand eine notwendige Änderung entdeckt. Und glauben Sie mir, sie werden es lieben, diese zu entdecken. Sie werden also versuchen, Ihren Kollegen keine Zugeständnisse zu machen. Dies ist der Zeitpunkt, an dem Sie sie verlieren und sie aufhören wollen, den neuen Prozess in Betracht zu ziehen.
Fragen und Antworten
Um zusammenhängende Prozesse effektiv in einem Swimlane-Diagramm zu gruppieren, sollten Sie zunächst alle an Ihrem Prozess beteiligten Parteien und die Aufgaben, für die sie verantwortlich sind, identifizieren. Danach können Sie diese Aufgaben nach Funktion oder nach Abteilung klassifizieren. Auf diese Weise können Sie klar erkennen, welche Aufgaben unter ein und dieselbe Überschrift fallen, so dass Sie verwandte Prozesse in einer Swimlane zusammenfassen können. Zweitens sollten Sie Ihre Gruppen verfeinern und sicherstellen, dass es keine Überschneidungen gibt, um die Möglichkeit von Redundanzen oder Verwechslungen bei der Überprüfung des Diagramms zu minimieren. Stellen Sie schließlich sicher, dass jede Swimlane einer chronologischen Abfolge folgt, um den Fluss und die Prozessreihenfolge aufrechtzuerhalten.
Ja, es gibt eine Reihe von Software-Tools, die Sie bei der Erstellung professioneller Standard-Schwimmbahnen-Diagramme unterstützen können. Dazu gehören Visio, Lucidchart, Gliffy oder Draw.io. Diese Tools verfügen über Vorlagen, die Ihnen den Einstieg erleichtern, sowie über intuitive Funktionen, mit denen Sie Ihr Diagramm leicht an Ihre speziellen Bedürfnisse anpassen können.
Die Erstellung eines Swimlane-Diagramms kann potenzielle Fallstricke bergen, wie z.B. eine zu starke Verkomplizierung, unklare Definitionen von Swimlanes und eine fehlende chronologische Reihenfolge. Um diese zu überwinden, sollten Sie das Diagramm übersichtlich halten, jede Swimlane klar definieren und eine logische Abfolge der Ereignisse sicherstellen. Pflegen Sie außerdem eine offene Kommunikation mit den Teammitgliedern und bitten Sie sie um ihre Beiträge für ein genaues und nützliches Diagramm. Vergessen Sie nicht, Ihr Swimlane-Diagramm zu aktualisieren, wenn sich Prozesse im Laufe der Zeit ändern.