
Five great work instruction examples

Seeking inspiration for work instructions? You’re not alone. Crafting clear guidelines can be puzzling, but we’re here to help. In this guide, we’ve gathered exemplary examples from various fields to ease your work. We’ll also sort through the confusion about the work instruction lingo. Now, let’s dive in and explore the lingo and some great work instruction examples.
What is the difference between a process, a procedure and a work instruction?
Have you ever pondered the distinctions between a process, a procedure, and a work instruction? Let’s dissect these concepts in a straightforward manner:
- Process: This is the overarching flow through an organization, outlining what is done and who is responsible. It’s a comprehensive view of operations.
- Procedure: Consider this as a detailed description of a workflow. t answers questions, such as what needs to be done, thereby establishing clear objectives. Additionally, it explains why each task is important, thus providing motivation and context. Furthermore, it sets the scene for the actions, effectively bridging the gap between theory and practice.
- Work Instruction: Here, we delve into the specifics. Initially, work instructions provide step-by-step guidance on how to perform a task, thereby offering a clear and methodical approach. Moreover, they are more detailed than procedures, specifically tailored for those executing the work, ensuring that each step is understood and applied effectively.
In summary:
- Processes define the What, Why, and Who.
- Procedures outline the What and Why.
- Work Instructions describe the How and When.
To illustrate, think of organizing a birthday party. The process encompasses the entire event, including planning and execution. The procedure might involve deciding to bake a cake for the party. The work instruction? It would specify each step for baking the cake, such as preheating the oven, mixing ingredients, and timing the baking.
Clear, right? With this foundation, let’s explore some exemplary work instruction examples from various sectors. Are you ready for some inspiration?
What is an example of a procedure vs work instruction?
Building on our previous discussion, let’s examine a practical example to differentiate a procedure from a work instruction:
Procedure: Making Coffee at a Coffee Shop
- Purpose: This aims to guarantee consistent taste and quality across all coffee beverages.
- Scope: This procedure is applicable to all baristas engaged in coffee preparation.
- Responsibility: Baristas are required to follow the established coffee-making process.
- Procedure Steps:
- Receive the order from the customer.
- Select the appropriate coffee beans or blend.
- Prepare the coffee using the designated machine (e.g., espresso, drip coffee).
- Serve the coffee to the customer, ensuring customer satisfaction.
Work Instruction: Making an Espresso
- Tools Needed: Espresso machine, grinder, tamper, filtered water, coffee beans.
- Steps:
- Activate the espresso machine and allow it to reach the required temperature.
- Grind the necessary amount of coffee beans to achieve a fine consistency.
- Fill the portafilter with the ground coffee.
- Evenly compress the grounds using the tamper.
- Secure the portafilter in the machine.
- Initiate the shot and allow it to pour for 25-30 seconds.
- Present the espresso in a pre-heated cup.
Do you notice the difference? The procedure outlines the broader steps – the ‘why’ and ‘what’ of coffee-making. The work instruction, in contrast, provides detailed guidance on the ‘how’ – the specific steps for making an espresso.
What is the difference between a SOP and SWI?
Navigating through the intricate maze of organizational processes and tasks, we frequently stumble upon abbreviations such as SOPs (Standard Operating Procedures) and SWIs (Standard Work Instructions). Each of these terminologies holds its distinct essence and application within the corporate framework. SOPs, primarily focusing on overarching procedures, provide a broader guideline for operations. Conversely, SWIs hone in on detailed steps for specific tasks, ensuring precision and consistency in execution. In essence, while SOPs paint the big picture, SWIs add fine brush strokes, refining the nuances of daily tasks. Understanding and differentiating these terms is pivotal for effective process management and seamless operational flow.
SOP (Standard Operating Procedure):
- Bird’s-Eye View: SOPs provide a comprehensive outline of the processes or tasks a team or department must follow. They serve as the strategic game plan.
- Purpose-Driven: These documents establish the ‘why’ behind a process, aligning everyone on its importance and goals.
- Scope & Application: SOPs clearly define responsibilities, specifying who is accountable for various tasks and outlining when and where these tasks should be executed.
- Flexibility: While focusing on the end goal, SOPs may offer some flexibility in the ‘how’, allowing for adaptability in achieving the desired outcome.
SWI (Standard Work Instruction):
- The Nitty-Gritty: SWIs are detailed and specific, focusing intensely on the ‘how’. They act as a detailed playbook for executing a particular task.
- Detail-Oriented: These instructions often include step-by-step guidelines, sometimes specifying exact timings or measurements for precision.
- Tool & Equipment Specifications: An SWI often lists necessary tools and equipment, providing guidance on their usage.
- Consistency Is Key: The primary aim of SWIs is to ensure uniformity in task execution, guaranteeing that every individual performs the task identically each time.
The overarching objective, whether it’s an SOP or an SWI, is to achieve clarity and efficiency in operations. When each team member understands their role and the exact steps involved, it leads to a harmonious and effective workflow.
What is a work instruction template?
Consider this scenario: You’ve received an intricate LEGO set – an exciting challenge. But imagine there’s no instruction manual. That’s a bit daunting, right? Similarly, in the workplace, this is where a work instruction template becomes crucial.
A Work Instruction, akin to a detailed manual for a LEGO set, acts as a crucial navigational tool in the professional landscape. Firstly, it lays out a clear, step-by-step format, thereby ensuring that tasks are performed with both accuracy and efficiency. Secondly, this indispensable guide is pivotal in fostering consistency and success in task execution. It effectively eliminates confusion and reduces reliance on memory. By methodically providing comprehensive directives, the template ensures precision in each task, thereby contributing significantly to a streamlined and efficient workflow.
Key Benefits:
- Consistency Across the Board: A template guarantees uniformity in instructions. Regardless of who’s executing the task – be it Jane in accounting or Bob in marketing – the guidance remains consistent, enhancing clarity and reducing confusion.
- Time and Effort Efficiency: Templates eliminate the need to start from scratch for each new task. They provide a foundational structure, allowing users to customize the specifics without losing the overall framework.
- Clarity in Communication: Similar to avoiding the distortions in a game of “telephone,” a well-designed work instruction template minimizes misinterpretations. It acts like clear traffic lanes, directing the flow of information accurately and effectively.
In the realm of professional tasks, a work instruction template is akin to a navigational tool. It not only guides and clarifies but also ensures that every team member can complete their tasks without unnecessary detours or misunderstandings. Far from being a mere document, it’s a vital component for streamlined and effective operations.
Now that we have a solid understanding of what a work instruction template is and its advantages, let’s explore some practical examples in different industries. Are you ready to see how these templates function in real-world scenarios?
What are standard work instructions?
Imagine you’re getting ready to build an incredible Lego castle. First, you gather all your colorful bricks. Next, you think about what you need to turn these bricks into a grand fortress. The answer is clear instructions! Similarly, in the world of work, Standard Work Instructions (SWIs) play a crucial role. They act like a detailed guide, helping you at every step. By following these instructions carefully, you ensure that each part of your project is done perfectly, just like building each section of your Lego castle piece by piece.
Standard Work Instructions (SWIs):
- Deep Dive into Details: SWIs are no mere overviews; they dive deep into the minutiae of a task, breaking it down into consistent, manageable steps. Think of them as your task-specific GPS, guiding you through each twist and turn.
- Uniformity Across the Board: The goal here is consistency. Whether it’s Joe, who’s just joined the team, or Jane, with a decade under her belt, SWIs ensure everyone performs tasks in the same, precise manner.
- Tool Time: These instructions don’t just list steps; they often detail the tools, equipment, or software needed, complete with a mini-tutorial on their use. It’s like having a mini tech support embedded in the instructions.
- Safety as a Priority: Particularly in settings like factories or laboratories, SWIs incorporate crucial safety guidelines, ensuring tasks are completed not just effectively, but safely – minimizing the chances of “Oops!” moments.
Now, how do these detailed instructions fit within the broader framework? Enter Standard Work. While SWIs provide the granular, step-by-step approach, standard work outlines the overall workflow, optimizing workloads and enhancing efficiency. Picture standard work as the blueprint of your Lego castle, and SWIs as the meticulous steps to place each brick perfectly.
In summary, SWIs are akin to the trusty manual ensuring your metaphorical Lego castle isn’t just built but stands tall, robust, and regal – a testament to the power of detailed guidance!
“Nothing is particularly hard if you divide it into small jobs.”
Henry Ford

What should be included in a work instruction?
Picture this: You’re tackling flat-pack furniture assembly, but you’re stranded without instructions. It’s a challenge, right? Now imagine you have a guide, but it’s missing crucial details. This scenario underscores the importance of complete and well-structured work instructions – the key to transforming a potentially wobbly table into a stable masterpiece.
Here’s a checklist for crafting an effective work instruction:
- Title & Objective: First and foremost, clearly name your instruction and outline the expected outcome, setting the initial stage for what is to come.
- Scope: Following that, clarify the applicability. Determine which teams or departments will utilize these instructions and for which specific tasks they are intended.
- Equipment & Tools: After establishing the scope, list all the necessary items, encompassing both hardware and software, needed to execute the task efficiently.
- Safety & Precautions: In addition, especially in technical settings, outline the required safety gear and identify potential hazards to be aware of.
- Step-by-Step Guide: Moving on, the core of your instruction is crucial. Provide detailed, sequentially ordered steps for completing the task, akin to a meticulously crafted recipe.
- Visual Aids: Furthermore, integrate diagrams, photos, or flowcharts to clarify complex steps and enhance overall understanding.
- Duration & Timing: Also, if timing is an essential aspect, include estimated durations for each step to facilitate effective time management.
- Quality Standards: Moreover, define the criteria for what constitutes successful task completion, establishing clear benchmarks for excellence.
- Roles & Responsibilities: Subsequently, specify who is responsible for each segment of the task. This step is vital in preventing overlaps and ensuring comprehensive coverage of responsibilities.
- Revision & Date: Additionally, document any updates or changes, recognizing that work instructions should evolve with the processes they describe.
- Feedback Mechanism: Finally, establish a channel for users to offer suggestions or report issues, fostering an environment of continuous improvement and adaptation.
Combining these elements results in a work instruction that’s not only easy to follow but also ensures consistent, high-quality task execution. It’s a formula for streamlined and effective operations in any workplace.
Examples of Work Instructions features
Integrated work instructions and SOPs
Build step-by-step instructions with text, media and files to explain how and why work is done.
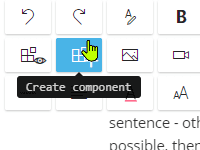
Reusable work instruction components
Turn selected content into components to be reused across processes, saving time and effort.
How do you write standard work instructions?
Imagine yourself as a director orchestrating a blockbuster movie. Similarly, in the realm of standard work instructions, you’re setting the stage for flawless execution. Just as a director ensures every actor knows their lines and cues, let’s explore crafting these instructions with the same precision.
- Identify the Purpose: Firstly, begin by understanding the overarching goal of the task or process you’re standardizing. Whether it’s ‘Quality Control in Product Packaging’ or ‘Client Onboarding Process’, achieving clarity is crucial.
- Engage the Experts: Next, collaborate with those who are deeply familiar with the task – the real-life performers. Their insights are invaluable and can significantly enhance the instructions.
- Document Current Best Practices: Then, assess and document what’s currently working effectively. This approach lays a strong foundation for future improvements.
- Detail Every Step: Subsequently, break down each action into clear, specific steps. Avoiding ambiguity is essential here, as precision is key for successful implementation.
- Utilize Visual Aids: Moreover, enhance your instructions with diagrams, flowcharts, or photos. These visual elements can greatly simplify complex instructions, making them more accessible.
- Standardize Tools & Resources: Following that, clearly specify any necessary tools or resources. This ensures consistency in execution across all team members.
- Emphasize Safety & Compliance: Furthermore, it’s important to incorporate any relevant safety measures or compliance requirements prominently within the instructions.
- Iterative Review & Feedback: Additionally, have a diverse group test the instructions. Gather feedback, refine, and iterate for continuous improvement.
- Regular Updates: Given that practices evolve over time, it’s essential to regularly revise and update your instructions to reflect the latest and most effective methods.
- Accessible Storage: Lastly, ensure that your instructions are easily accessible to all relevant personnel, whether stored digitally or as physical copies.
By following these steps, you can craft work instructions that are as meticulously planned and executed as a director’s vision for a film, ensuring smooth and effective operations.
For comprehensive guidance, refer to the International Organization for Standardization (ISO), which offers extensive resources on crafting effective and standardized work instructions, promoting consistency and quality in various fields.
By following these steps, your standard work instructions can become like a well-rehearsed play, where every participant is perfectly in sync, delivering exceptional performances time after time. With these guidelines, you’re on track to achieving outstanding results in your organizational processes.
👉 Recommendation: When writing standard work instructions, prioritize clarity and simplicity. Collaborate with on-the-ground team members for accuracy, and use visuals for better comprehension. An easily understandable instruction leads to consistent results and enhanced productivity.
Example #1: Construction Work Instruction Template
Building a structure, be it a cozy home or a soaring skyscraper, is akin to conducting an intricate symphony. This process demands a harmonized effort from diverse professionals such as architects, engineers, laborers, and project managers. Much like a symphony relies on detailed sheet music, construction projects require thorough work instructions. Let’s lay the groundwork for such a template.
- Project Overview: Initially, start by providing a concise outline of the project. Whether it’s a residential home, a commercial complex, or perhaps a bridge, offering a clear overview is essential.
- Scope & Boundaries: Next, define the project’s scope. Determine whether the project encompasses only the main structure or if it includes adjoining constructions as well.
- Materials List: Then, comprehensively catalog all necessary materials, ranging from bricks and bolts to beams, specifying both the types and quantities.
- Tools & Equipment: Subsequently, list all required machinery and safety equipment. This could include everything from cranes and bulldozers to helmets and safety boots.
- Step-by-Step Process: Follow this by outlining the key phases of construction:
- Site preparation.
- Laying the foundation.
- Undertaking structural work such as beams and pillars.
- Constructing masonry and walls.
- Completing roofing.
- Applying finishing touches, including painting and flooring.
- Safety Protocols: Additionally, highlight essential safety protocols specific to construction, like safe tool handling and precautions for tasks at heights or involving electricity.
- Quality Checks: Also, establish checkpoints to assure quality, such as verifying the consistency of cement or the alignment of bricks.
- Team & Roles: Clearly delineate the responsibilities of each team member, from the site supervisor to the crane operator, ensuring clarity in roles.
- Timeline: Provide an estimated timeline, including projected start and end dates. Incorporating a Gantt chart can effectively illustrate the progression of different stages.
- Emergency Contacts: Make sure to list vital contact information for emergencies, covering everyone from site managers to medical services.
- Feedback & Revision Loop: Lastly, encourage a culture of ongoing improvement by incorporating feedback from team members, allowing for adjustments and enhancements as needed.
Free Construction Work Instruction Template
Optimize projects with our free Construction Work Instruction Template. Download now for streamlined planning and execution.
By integrating these components into your work instruction template, you ensure a comprehensive and systematic approach to construction, mirroring the precision and coordination of a well-conducted symphony.
For further guidelines and standards in creating effective construction work instructions, resources from the American Society of Civil Engineers (ASCE) offer valuable insights into industry best practices.
A well-crafted construction work instruction template ensures the architect’s vision is not just realized but also results in a safe, enduring structure. With a thorough template, you’re building more than just buildings; you’re crafting lasting legacies.
“Simple can be harder than complex: You have to work hard to get your thinking clean to make it simple. But it’s worth it in the end because once you get there, you can move mountains.”
Steve Jobs

Example #2: Manufacturing Work Instruction Template
Welcome to the world of manufacturing, a place where raw materials are skillfully transformed into remarkable products. For those orchestrating this transformation, leaving nothing to chance is key. A well-defined work instruction is essential. Let’s gear up and outline a template that navigates the journey from raw material to finished product.
- Product Overview: Begin by describing the final product. Whether it’s a high-tech smartphone, a robust automotive part, or a gourmet chocolate bar, set the stage with a clear picture.
- Material Specifications: List the raw materials involved, such as metals, plastics, or ingredients, including their precise specifications.
- Equipment & Machinery: Identify the critical tools and machinery needed – lathes, conveyor belts, molds, and more.
- Stepwise Production Process: Outline the production stages:
- Pre-production setup.
- Processing of raw materials.
- Assembly or integration.
- Quality checks and inspections.
- Final packaging and labeling.
- Safety Protocols: Detail safety measures relevant to the machinery, chemicals, or tools used. Include personal protective equipment like safety glasses, gloves, and ear protection.
- Quality Assurance & Control: Define quality standards and inspection processes. This might include dimensional checks, taste tests, or durability assessments.
- Team & Roles: Clarify the responsibilities of machine operators, supervisors, quality inspectors, and other key personnel.
- Timeline & Production Targets: Specify expected timelines for each production phase and set overall production targets.
- Maintenance & Cleaning: Address post-production maintenance, including cleaning and calibrating machinery.
- Feedback & Continuous Improvement: Encourage feedback from team members to refine processes continually.
Free Manufacturing Work Instruction Template
Optimize production with our free Manufacturing Work Instruction Template. Download now for efficient processes.
For comprehensive insights on manufacturing work instructions, the National Association of Manufacturers (NAM) provides a wealth of best practices and industry standards.
Armed with this template, you’re equipped to ensure that the manufacturing process is not only efficient and safe but also consistently produces high-quality results. Let’s set the stage for manufacturing excellence!
What are work instructions in a work area?
In the professional landscape, Work Instructions act as an essential roadmap. They provide employees with detailed guidance on how to execute specific tasks or operations within their work environment. Here’s a closer look at their role and importance:
- Clarity in Action: These instructions offer precise, easy-to-follow directives for completing a job or task. Comparable to a recipe for baking a cake, every step is crucial for achieving the intended outcome.
- Safety First: In settings like manufacturing plants or laboratories, work instructions are critical for upholding safety standards, significantly reducing the risk of accidents or hazards.
- Consistency Across the Board: Work instructions ensure uniformity in task execution, regardless of whether it’s an employee’s first day or their hundredth. This consistency is vital for maintaining product or service quality.
- Streamlined Training: For newcomers, these instructions act as an invaluable reference, simplifying the onboarding process and enhancing the effectiveness of training.
- Boost in Efficiency: With a clear, defined approach, employees can concentrate on their tasks with confidence, minimizing doubts and enhancing overall productivity.
In summary, work instructions in a workplace function like navigational lines on a road. They guide the workflow, prevent operational mishaps, and guarantee that everyone achieves their objectives safely and competently. Be it an office, a factory floor, or a retail space, these instructions are the linchpins that ensure operations run smoothly and efficiently.
👉 Recommendation: For optimal efficiency in any work area, develop clear, visual work instructions tailored to specific tasks. Engage team members in their creation to ensure accuracy and accessibility. A well-informed team results in fewer errors and higher productivity.
Example #3: Packing Work Instruction Ideas and Examples
Packing, seemingly straightforward, is actually a delicate blend of art and science. It’s about ensuring a fragile item survives a long journey unscathed or that fresh produce stays as crisp at the destination as it was when packed. Here are some creative yet practical ideas and examples to perfect your packing process.
- Objective of Packing: Begin with the ‘why’. Are you aiming for safe transportation, protection from the elements, aesthetic presentation, or a combination of these?
- Material List: Document the materials required – bubble wrap, cardboard boxes, plastic seals, temperature-controlled packages for perishables, and so on.
- Equipment Required: Identify the necessary tools – from simple tape dispensers to sophisticated automatic packing machines.
- Sequential Steps:
- Pre-packing Prep: This might involve cleaning the item, inserting informational leaflets, or a thoughtful thank-you note.
- Layering: Detail the sequence of packing layers (e.g., bubble wrap, paper, then box).
- Sealing & Labeling: Provide instructions for sealing the package and positioning labels or stickers.
- Final Check: Establish a checklist for the final review, such as a shake test or weight verification.
- Safety & Fragility Considerations: For delicate items, outline procedures to prevent damage, like using ‘Fragile’ stickers and ensuring adequate padding.
- Storage & Stacking Guidelines: Offer advice on storage, particularly for items sensitive to temperature or humidity, and stacking limitations.
- Custom Instructions: Cater to unique packing needs, such as vacuum-sealing or decorative wrapping for gifts.
- Unpacking Instructions: Sometimes, the method of unpacking is as crucial as packing, particularly for technological items or those with multiple components.
- Feedback Loop: Encourage feedback from team members or customers to refine the process continually.
Example: Packing a Porcelain Vase
To illustrate, let’s outline the packing process for a porcelain vase:
| Section | Details |
|---|---|
| Objective | Protect from breakage during transport. |
| Materials | Bubble wrap, peanuts, double-walled box. |
| Steps | 1. Clean the vase. |
| 2. Wrap in 3 layers of bubble wrap. | |
| 3. Fill box 1/3 with peanuts. | |
| 4. Place wrapped vase in, fill remaining space with peanuts. | |
| 5. Seal tightly, label as ‘Fragile’ on all sides. |
Efficient packing is like sending a message of care and attention. With these guidelines, every package you send becomes a testament to your dedication to quality. Ready to pack each item with precision and care, ensuring it arrives as a perfect parcel?
Free Packing Work Instruction Template
Discover the art of packing! Learn to protect fragile items and keep produce fresh. Get our guide for creative, practical packing tips. Download now!
Example #4: Engineering Work Instruction Template
Engineering, a field where logic and creativity intertwine, requires clear communication to transform innovative designs into reality. Let’s build a bridge between these ideas and their practical use with a straightforward work instruction template.
- Project Objective: First, clearly state what you’re aiming to do. Whether it’s building a robot, designing a bridge, or creating new software, knowing your goal is key.
- Materials & Components: Then, list the materials needed, like metals, microchips, or software libraries. Understanding what you need is vital for getting started.
- Tools & Software: Next, engineers use different tools, from CAD software to soldering irons. Make sure to list these, including specific types if they’re important.
- Step-by-Step Process:
- Design Phase: Begin with your initial designs, like sketches or CAD drawings.
- Prototyping: Move on to making a small version or just a part of your project.
- Testing & Validation: Now, check your work with tests, debugging, or simulations.
- Final Implementation: After that, start the actual building or coding.
- Review & Feedback: Then, see if the final product matches what you first thought of.
- Safety & Compliance: Especially in areas like civil or electrical engineering, it’s crucial to focus on safety and follow rules.
- Quality Assurance: Explain how to check if the final product is good enough, like doing specific tests or inspections.
- Team Roles & Responsibilities: Clearly say who does what, which is super important when lots of people are working together.
- Timeline & Milestones: Set out a clear plan with important dates and checkpoints along the way.
- Documentation & Reporting: Engineers need to keep track of information. Say what reports are needed, how they should look, and when they should be done.
- Feedback & Iterations: Lastly, be open to making changes based on what others say. Sometimes the first try isn’t the best.
Engineering projects can be tricky, but with well-made instructions, everyone from the designers to the testers can work together smoothly. With this template, you’re ready to make your awesome ideas a reality. Let’s engineer the future, one step at a time!
Free Engineering Work Instruction Template
Transform ideas to reality with our Engineering Template: A-Z steps from design to QA. Perfect for complex projects. Download for streamlined success!
Example #5: Visual Work Instruction Template
In the realm of visuals, where images often speak louder than words, visual work instructions can be a game-changer, particularly in dynamic environments or for complex tasks. Let’s construct a template for creating effective visual work instructions that speak volumes.
- Purpose of the Visual: Firstly, determine the objective. Are you aiming to demystify a complex assembly, highlight safety measures, or provide a quick reference guide? Identifying the purpose is crucial.
- Selection of Visual Medium:
- Photographs: Ideal for capturing real-life scenarios or showcasing products.
- Illustrations or Diagrams: Excellent for deconstructing abstract concepts or intricate mechanisms.
- Flowcharts: Optimal for outlining processes with multiple decision points.
- Videos: Highly effective for step-by-step guidance in tasks like machinery operation or software usage.
- Annotations:
- Use legible fonts and minimal text, ensuring it’s informative.
- Employ visual aids like arrows or highlights to direct focus to key areas.
- Sequential Steps:
- Number steps for straightforward guidance.
- Provide a distinct visual for each step.
- Ensure a seamless, logical flow throughout.
- Colors and Symbols:
- Utilize universally recognized symbols for immediate comprehension.
- Maintain a consistent color scheme, highlighting critical steps or warnings with distinctive colors.
- Size and Scaling:
- Ensure visuals are clear and appropriately sized.
- Keep scale consistent, particularly for illustrations involving multiple elements.
- Interactivity (for Digital Visuals):
- Implement interactive features like tooltips or clickable areas for more detail.
- Include options to zoom in on complex parts.
- Safety and Compliance Icons: Represent safety protocols or compliance requirements with universally recognized icons.
- Feedback Loop: Incorporate a mechanism for users to offer feedback or report discrepancies.
- Updates & Version Control: Include information on the version and date of the latest update, as visuals often require periodic revisions.
The essence of visual work instruction lies in its ability to convey processes clearly and succinctly, minimizing misunderstanding and errors.
With this blueprint, you’re equipped to create visuals that not only convey information effectively but also, consequently, enhance user engagement and understanding. Let’s transform complex instructions into visual masterpieces!
How do you organize work instructions?
Organizing work instructions can be likened to arranging a closet. Just as you wouldn’t randomly toss various clothing items together, expecting to quickly find a specific piece, a similar approach is needed for work instructions. Therefore, having a well-structured set of instructions is essential. It not only saves time but also reduces errors and streamlines workflow for seamless operations.
- Start with Clear Titles: Each instruction should begin with a descriptive title, like “How to Reset the Server” or “Steps for Monthly Inventory Check,” which instantly clarifies its purpose.
- Break it Down with Subheadings: Similarly to how you’d organize shirts, pants, and accessories separately, categorize related tasks or steps under relevant subheadings. This method significantly enhances readability.
- Sequential Steps: Ensure that tasks are ordered in the exact sequence they are to be performed. Providing step-by-step clarity is crucial.
- Use Visuals: Incorporate diagrams, photos, or flowcharts. Remember, visuals can often convey complex information more effectively than text alone.
- Highlight Safety Protocols: Particularly in industries where safety is paramount, emphasize safety steps by bolding or highlighting them.
- Regular Reviews & Updates: Given that tasks and tools evolve, it’s important to periodically review and update your instructions to keep them relevant and current.
Now, let’s turn our attention to Gluu, an innovative platform that offers exceptional features for organizing work instructions. Some of its key offerings include:
- Templates for Various Needs: Gluu provides versatile templates suitable for sectors ranging from manufacturing to IT, simplifying the process of creating instructions.
- Interactive Workflows: Elevate your instructions with interactive elements like videos and links, making them more engaging.
- Integrated Feedback Loops: This feature allows for gathering insights directly from the users, facilitating continuous improvement.
- User-Friendly Editor: Gluu’s editor is intuitive and easy to use, making the creation and editing of work instructions accessible to all, regardless of technical expertise.
For those interested in exploring Gluu’s Work Instruction Features further, delving into their offerings could be enlightening.
In essence, well-organized work instructions go beyond mere neatness. They play a pivotal role in ensuring tasks are executed correctly, efficiently, and consistently every time.
Conclusions
Creating good work instructions is akin to making a clear roadmap; it should be straightforward and user-friendly, distinctly showing each step. Similarly, regardless of whether you work in a factory, an engineering firm, or any other type of job, clear instructions can significantly streamline tasks and reduce confusion for everyone. Moreover, this article has methodically walked you through various facets of work instructions, encompassing their basic structure to adaptable templates across different sectors. Importantly, remember that at the heart of every instruction is the ultimate goal to empower and inform your team. Therefore, it’s crucial to collaborate, maintain simplicity, and never underestimate the transformative power of a well-crafted work guideline. Consequently, here’s to smoother processes and an empowered team, one instruction at a time!
Frequently Asked Questions
SOPs are like the table of contents in a book – they give you an overview of the main points. On the other hand, work instructions are like detailed recipes. They tell you exactly what to do and how to do it, step by step. So, while SOPs tell you what needs to be done and why, work instructions show you the exact way to do it.
Think of work instructions like a bike. Just like you’d check a bike’s tires or brakes regularly, especially after using it on different terrains or if someone suggests a change, work instructions need regular check-ups too. This way, they stay up-to-date, helping everyone work quickly and safely.
Using pictures, charts, or diagrams in work instructions is like adding illustrations to a book. They make things easier to understand, especially if the task is tricky or if people speak different languages. Even if they’re not always needed, it’s a good idea to include them because they make instructions clearer and quicker to follow.