
Goal: Create a clear process map with roles, activities, and work instructions in one flow.
The single-page editor lets you map a process and write work instructions without switching screens. Tell the Assistant what you want in the diagram and it will create a simple activity flow with a start and an end.
When you’re done with the wizard, open the Editor to add advanced notation with BPMN 2.0 elements.
Before you start #
- Plan: Creating a process, adding roles, and mapping the activity flow (steps 1–3) are available on all plans, including Core. Adding work instructions (step 4) requires the Essential plan or above.
- Role: Users with the Manage processes permission can create new processes in the hierarchy (step 1). Process owners and editors can edit a specific process from step 2 onward.
- Setup: Agree on the process name and outcome (1–2 sentences), list the roles involved, and optionally collect any procedures or links you want to include.
1. Create the process #
Click the arrow next to “New process” and choose “Process”.
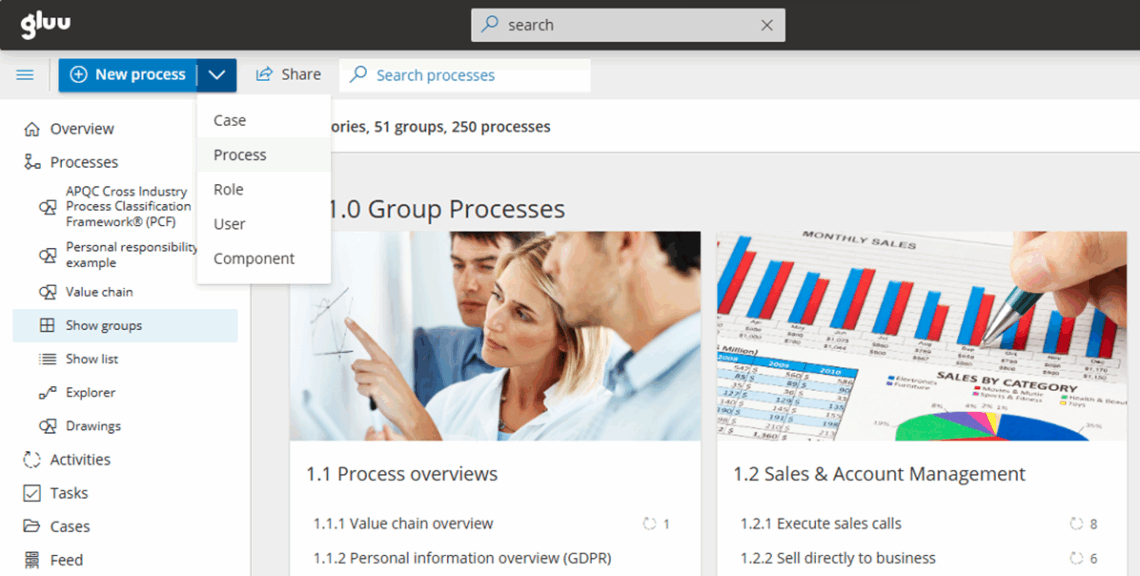
Choose the process location in your process hierarchy.
Enter “Process name” and a short “Outcome”.
Select a starting process (or leave it to start with an event).
Click “Create” to open a blank diagram (uncheck “Go to process” if you’re only building the hierarchy now).
You’re done once a blank diagram opens for the new process.
2. Add roles (swimlanes) #
Click “Define roles”.
Select the roles suggested (or add new if needed).
Order roles by importance or activity volume.
Click “Next”.
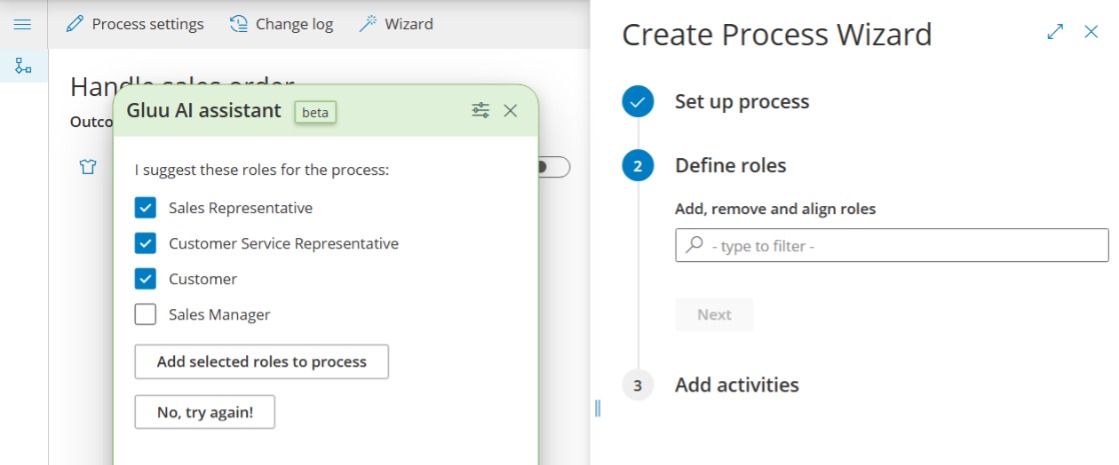
You’re done once your roles appear as ordered swimlanes in the diagram.
3. Map the flow with activities #
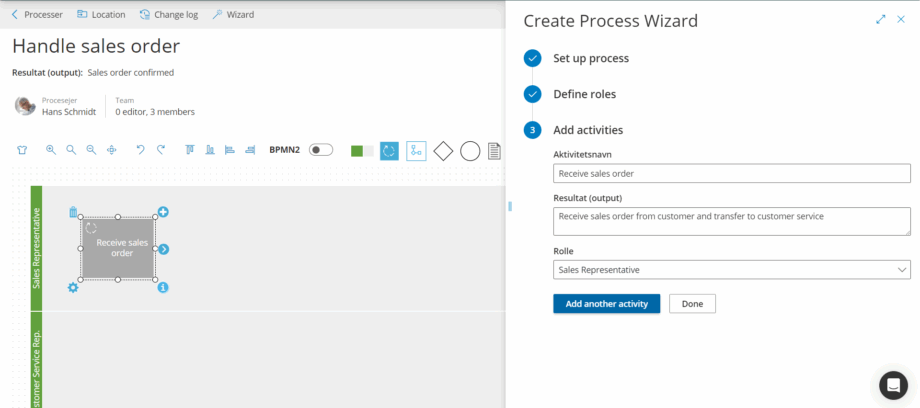
Select the Assistant’s suggested activities for each role.
Edit activity names and outcomes if needed.
Order activities in the required sequence by dragging and dropping up and down.
Select an ending process (or end with an event).
Click “Done” to create a draft diagram.
(You can reopen the wizard anytime if you prefer it over the editor.)
You’re done once you have a draft diagram with a start, your activities in sequence, and an end.

4. Add work instructions #
Requires the Essential plan or above.
You can skip this step if you don’t want to add work instructions. However, combining process drawings and work instructions can help you make diagrams much simpler since specific how-to information will be available inside the activity as work instructions.
Click an activity to open its details. Add instructions in one of three ways:
- Manual — Write from scratch with the toolbar.
- Rewrite and enrich — Add notes and visuals, click the Gluu Assistant icon, then choose “Rewrite instruction text”. Requires Essential plan or above.
- Automated — Click the Gluu Assistant icon for “Why” and “How” suggestions. Requires Essential plan or above.
Repeat until all activities turn blue — activities with work instructions show as blue in the diagram, indicating they have content ready for users.
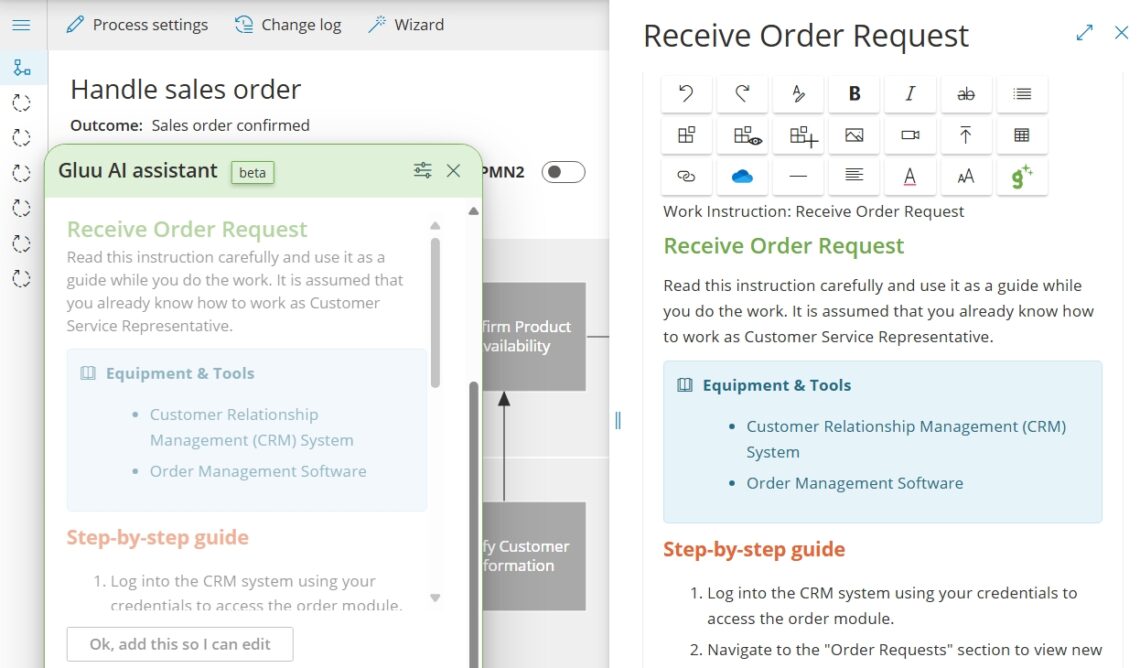
You’re done once every activity you want documented has turned blue.
5. Save as draft #
Turn off “Edit mode” to save your work as a draft. The process is not yet published — it is only visible to you and any editors you invite to collaborate.
Each time you publish, a new version is created that you can view or restore later.
You’re done once Edit mode is off and the process is saved as a draft.
6. Next steps #
Learn how to publish and maintain a process.
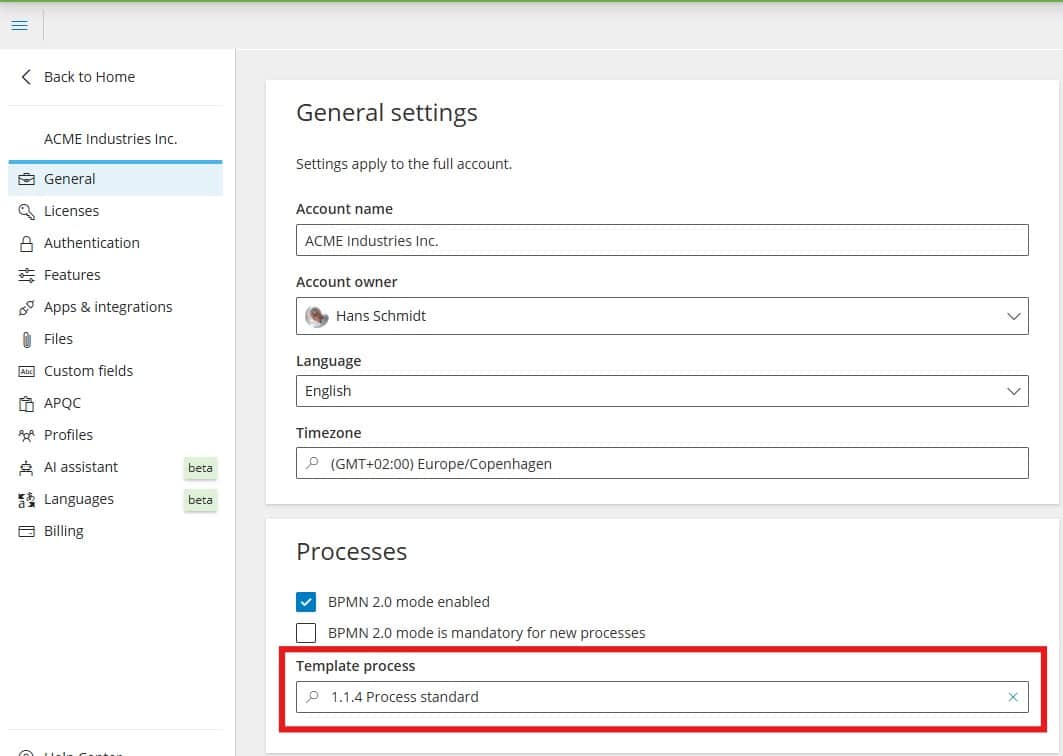
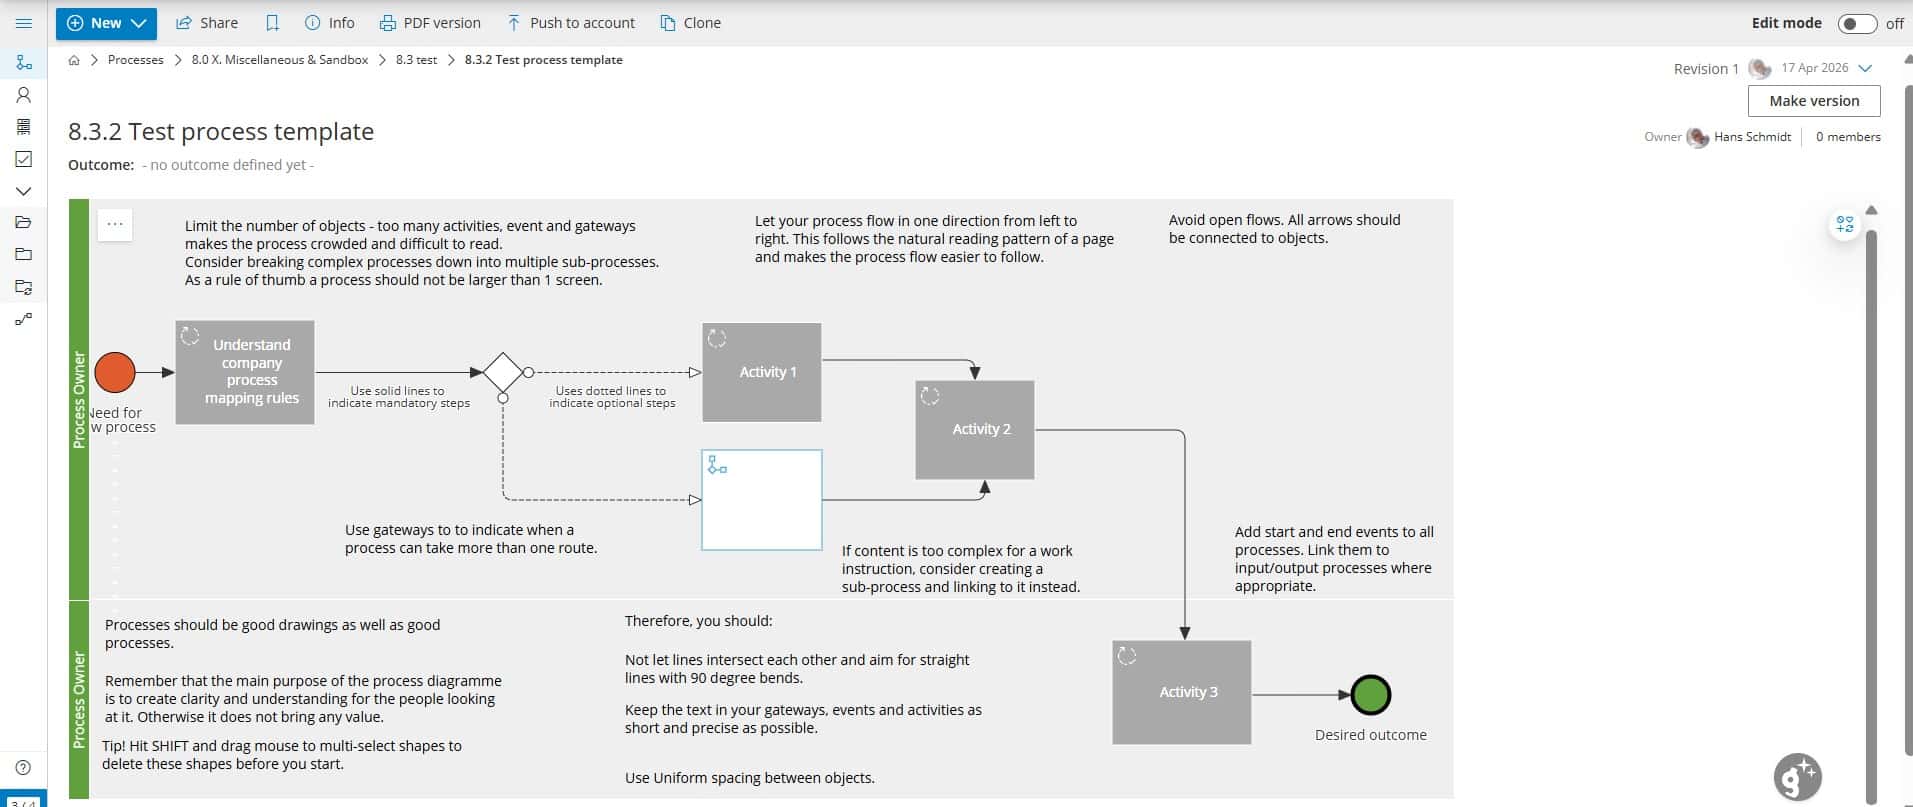
TIP! You can use a process template to guide users on your company standard for mapping processes. Go to Account settings → General to choose the template process — it is automatically shown whenever a user creates a new process.
Video guide #
It’s all presented in this short guide:
FAQ – Map a process #
Yes. Creating a process, adding roles, and mapping the activity flow (steps 1–3) are available on all plans including Core. Adding work instructions to activities (step 4) requires the Essential plan or above — Core plan users will not see the work instruction editor.
Turning off Edit mode saves your work as a draft. A draft is only visible to you and any editors you have invited — it is not yet accessible to regular users. Publishing makes the process live and creates a versioned snapshot. Publishing is covered in the Publish and maintain a process article.
Activities with work instructions turn blue in the process diagram. An activity without a work instruction stays grey. Once all activities are blue, every step in your process has documented instructions, making the map a complete guide for business users.
Yes. The Gluu Assistant can suggest Why and How content for any activity, and can also rewrite existing notes and visuals into a formatted work instruction. This feature requires the Essential plan or above. Click the Assistant icon on the activity page to get started.
Yes. The wizard creates a draft diagram which you can open in the full process editor at any time by turning on Edit mode. The editor gives you access to all toolbar options, shape types, connector settings, and BPMN 2.0 notation. You can also reopen the wizard from within the editor if you prefer that interface.
A process template is an existing process that is automatically shown to users as a starting reference whenever they create a new process. It helps teams follow a consistent structure. To set it up, go to Account settings → General and select the process you want to use as the template.


