
Goal: Build a case template, run cases, add one-off tasks, and manage changes—so each case flows correctly from start to finish.
Gluu lets you create scheduled (recurring) tasks or case-based tasks triggered when a user starts a case. This article covers case-based tasks.
Before you start #
- Plan: Cases require the Advanced plan. HR visibility, for cases with highly sensitive data, additionally requires the HR add-on.
- Role: You need edit rights on the process to create or change a case template.
- Setup: No special setup—open the process and go to Cases > Case templates.
1. Create a case template #
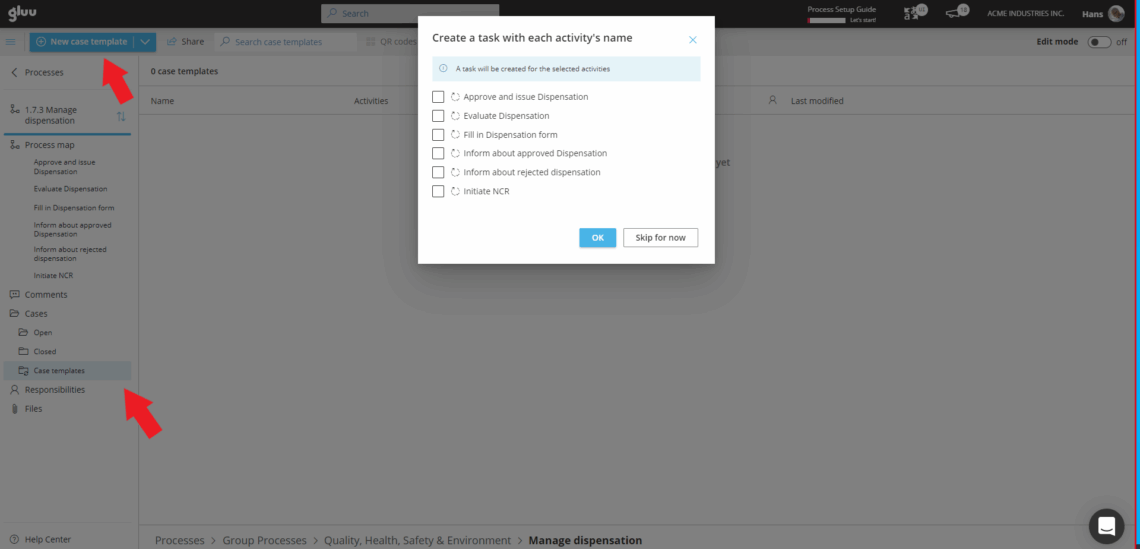
Open the process that you want to run as a case. In the left menu, go to Cases > Case templates.
Click New case template (requires edit rights).
If a pop-up offers auto-creation then Choose activities to include (auto-adds one task per activity), or click Skip to start from scratch:
Name the template (you can refine it after setup). To allow adjustments at case start, enable Allow edit before case start. If template is obsolete but existing cases are running using the template, select Prevent use on new case.

You’re done once the template is named and its start-time settings match how you want new cases to behave.
2. Select case visibility #
You can choose from 3 different case template visibility levels:
- Default: Shows the case to everyone who can see the process.
- Case team: Shows the case only to the users directly involved in the case.
- HR: Shows the case only to the selected user and the user’s manager. For cases with highly sensitive data. Only available with the HR add-on.
You’re done once the visibility level matches who should be able to see the case.
3. Set sequence and logic #
- Drag activities into order. (use the four-dot handle.)
- For each activity, choose when its tasks start:
• By time: a specific date/time per case.
• After critical task: show tasks only when a marked “critical” task in the previous activity is complete.
• Immediately: create on case start. - Assign a user/users responsible for tasks if needed (default: visible to all users in that role).
- Order tasks and mark any as Critical (gates later tasks).
- Optionally add or reuse existing tasks linked to activity (Learn more about creating and managing tasks).
- Adjust case team if needed (See below for more info).
- Save the template (not possible if template is not named).

You’re done once the activities are ordered, their tasks’ start logic is set, and the template is saved.
Adjust Case team #
- Click Case team
- Add any users not already part of the process that should be able to complete tasks to Additional case users.
- Select a specific role under Editors if you want to restrict case edits to a certain group of people (process owners/editors and whoever starts the case can edit per default.
- Select a role or specific users under Viewers that are allowed to see the case regardless of visibility type chosen and process and/or case team membership. For HR cases the users can view case progress, not case content.
- Select whether all users with the role should be able to complete it, only one or more named users or a template user.
- Write a hint to guide the user starting the case on who to choose. See more info on template users in “Manage advanced cases”.
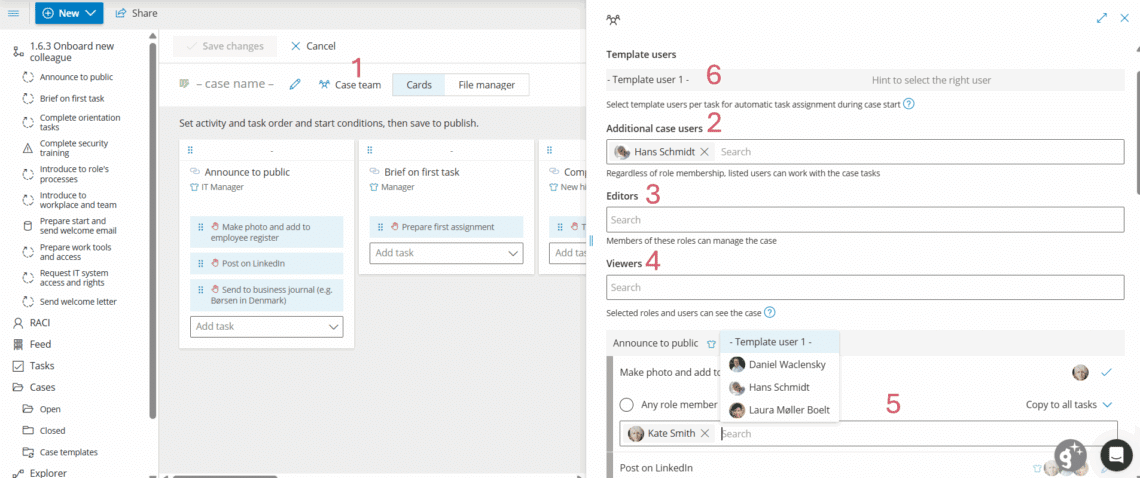
You’re done once the case team’s additional users, editors, viewers and assignment hints are set and the template is saved.
4. Run cases #
Go to Cases and click New case. Select a template.

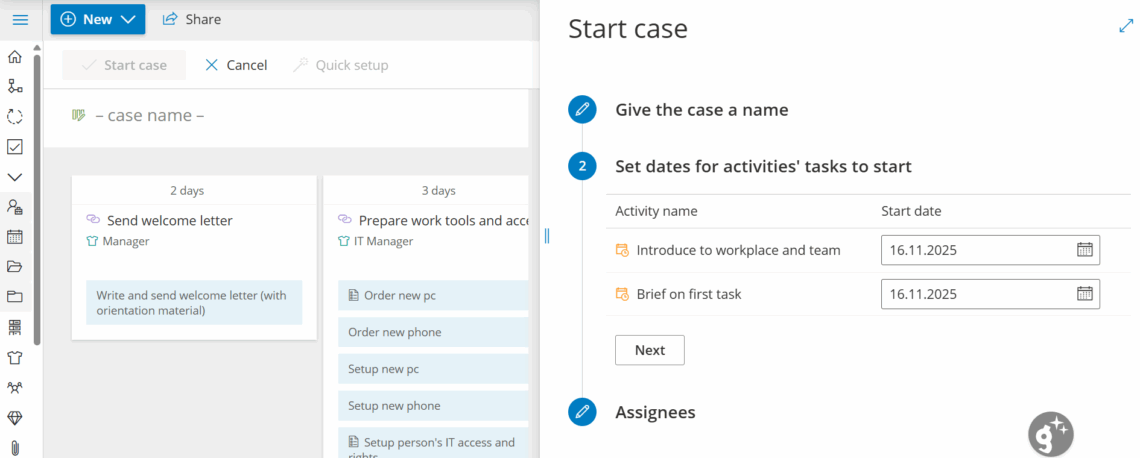
Name the case (e.g., customer or project reference).

Set dates for any time-based activities.
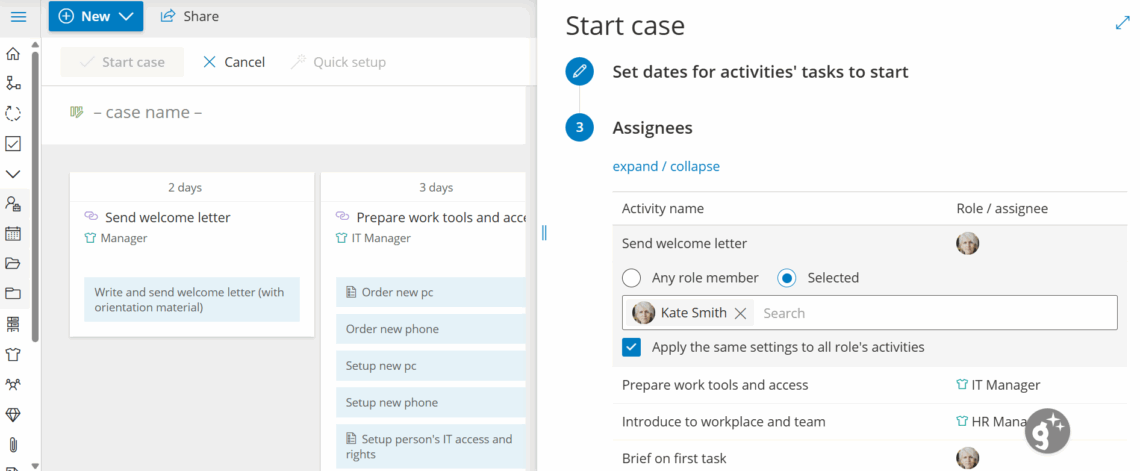
For activities, assign specific users instead of “anyone with the role” (optional).
Click Start case or Close and adjust for more options (see “Manage a running case” below for more detail).
Tasks appear to users based on role or personal assignment. For advanced team/assignment control, see the dedicated article “Manage advanced cases”.
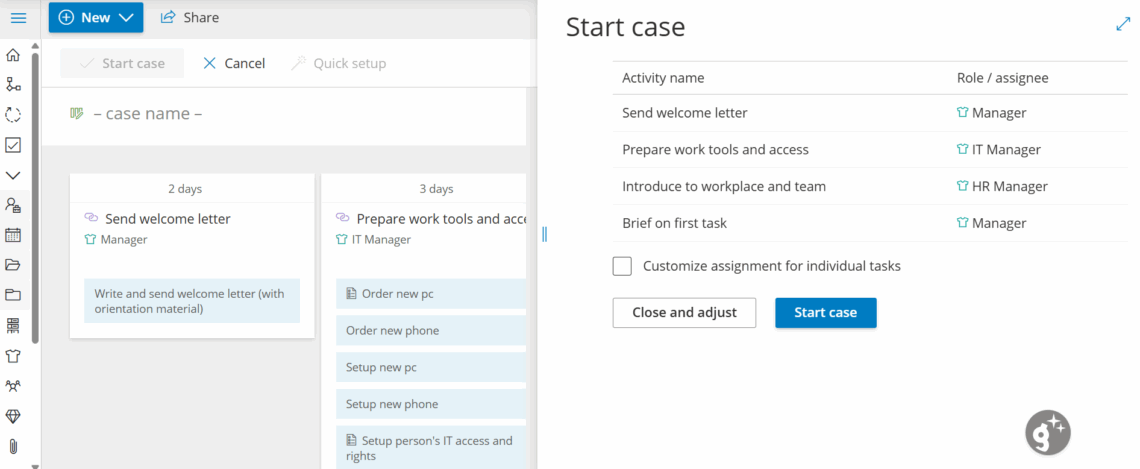
You’re done once the case is started and tasks appear to the right users based on role or assignment.
How users see and complete tasks at the right time
Add a one-off task #
Use one-off tasks for exceptions that shouldn’t change the template.
- Open the case and click Edit.
- Find the activity where you need the extra task.
- Click + to add a one-off task.
- Name it and (optionally) attach a form, set Critical/Priority, or create for multiple users.
- Click Create task, then Save the case.
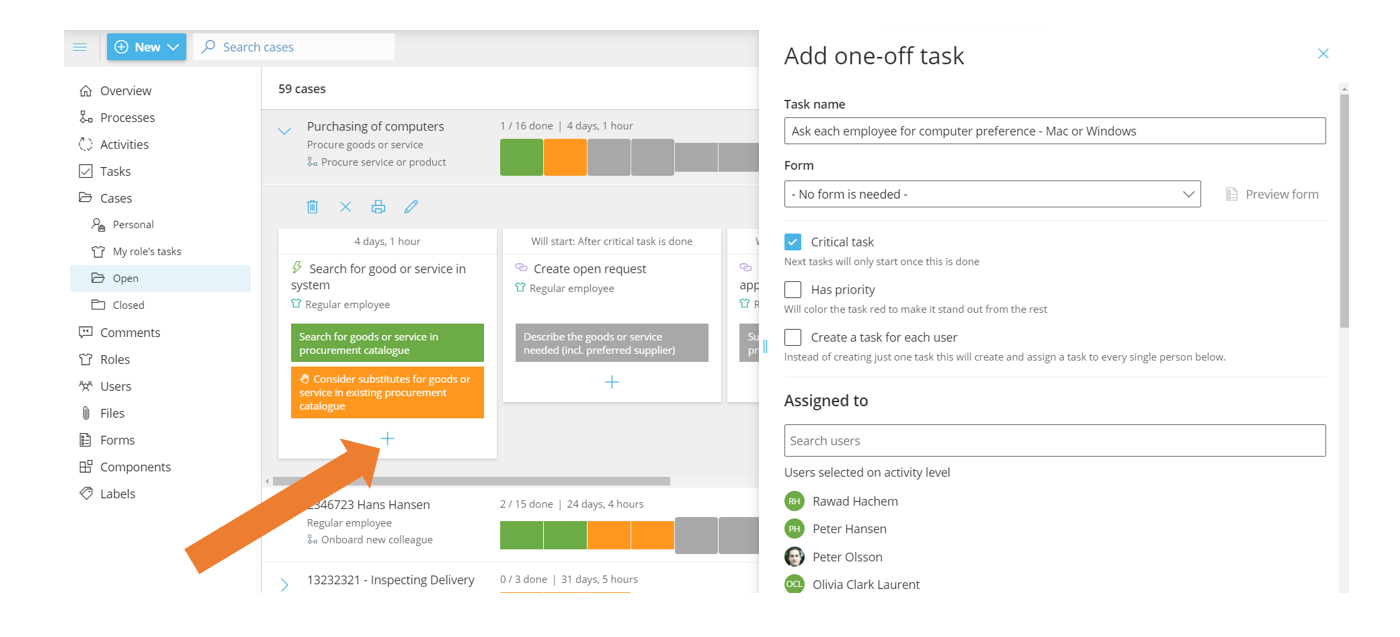
Note: A one-off task only exists in that specific case.
You’re done once the one-off task is created and saved on the case.
5. Manage a running case #
You can change any task that hasn’t started yet.
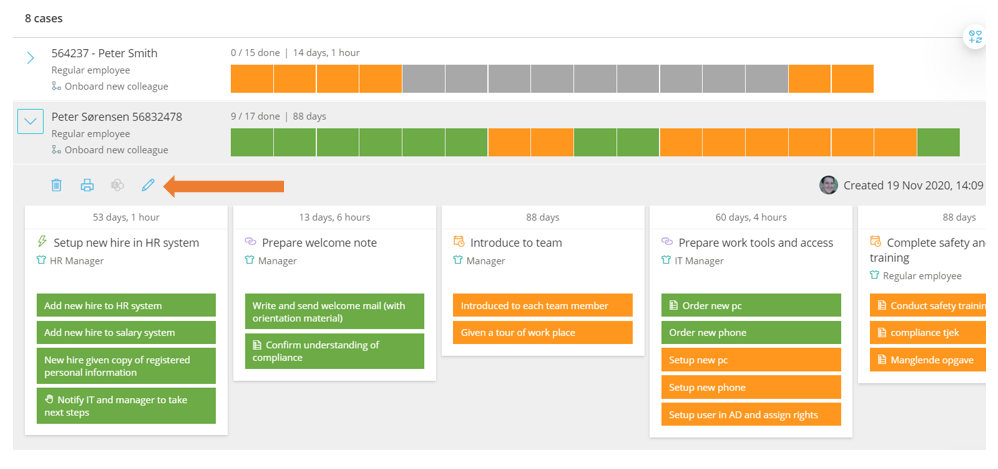
- Open the case overview and click the pencil to enter Edit mode.
- Select an activity to adjust settings on the right.
- Click Save to apply changes.
You can: add/remove activities and tasks, change timing/logic, reorder tasks and activities, change target duration, update assignments, and rename the case.
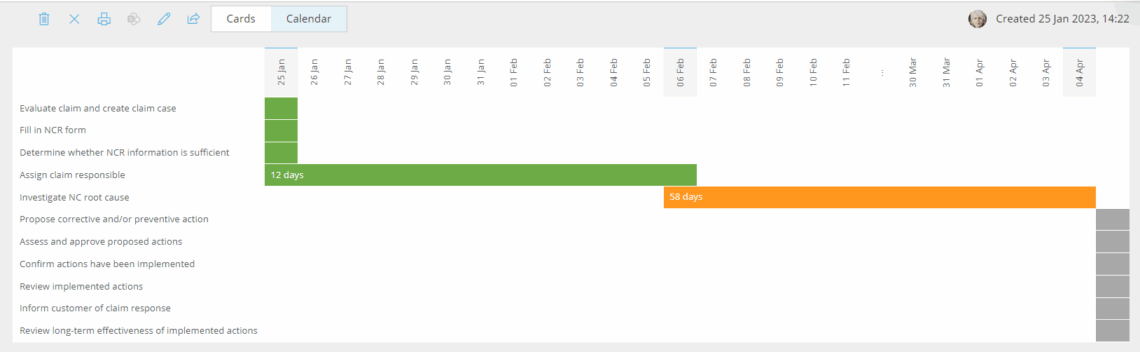
Note: Use Calendar view to see throughput: completed tasks (green) show time from activation to completion; open tasks (orange) show current elapsed time.
Note: Use the case Feed to review all comments in one place.

You’re done once your changes are saved and reflected in the case’s activities, timing, or assignments.
Video case: Employee Onboarding #
This webinar gives you an in-depth example of running onboarding as cases:
FAQ – Manage case templates #
Cases require the Advanced plan. The HR visibility level, meant for cases with highly sensitive data, additionally requires the HR add-on.
Default shows the case to everyone who can see the process. Case team restricts it to users directly involved in that specific case. HR shows it only to the selected user and their manager, and is reserved for highly sensitive data—it requires the HR add-on.
Marking a task Critical gates what comes after it—later tasks or activities set to start 'After critical task' won't appear until the critical task is completed. Regular tasks don't block anything downstream.
Yes. Open the case, click Edit, find the activity, and click + to add a one-off task. It only exists in that specific case and doesn't affect the template or other cases.
Yes, for anything that hasn't started yet. Open the case, enter Edit mode via the pencil icon, and you can add or remove activities and tasks, change timing and logic, reorder items, update assignments, and rename the case.
Use the Calendar view: completed tasks show in green with the time from activation to completion, and open tasks show in orange with their current elapsed time, giving you a quick read on throughput.


